Published · Updated
How to Mount a Staghorn Fern: Medium, Board, Tying, and the First Two Weeks
Mounting is the one decision that shapes a Platycerium for the next decade. Here is how a grower thinks about medium, board, tying and the two weeks after, before the plant settles in.
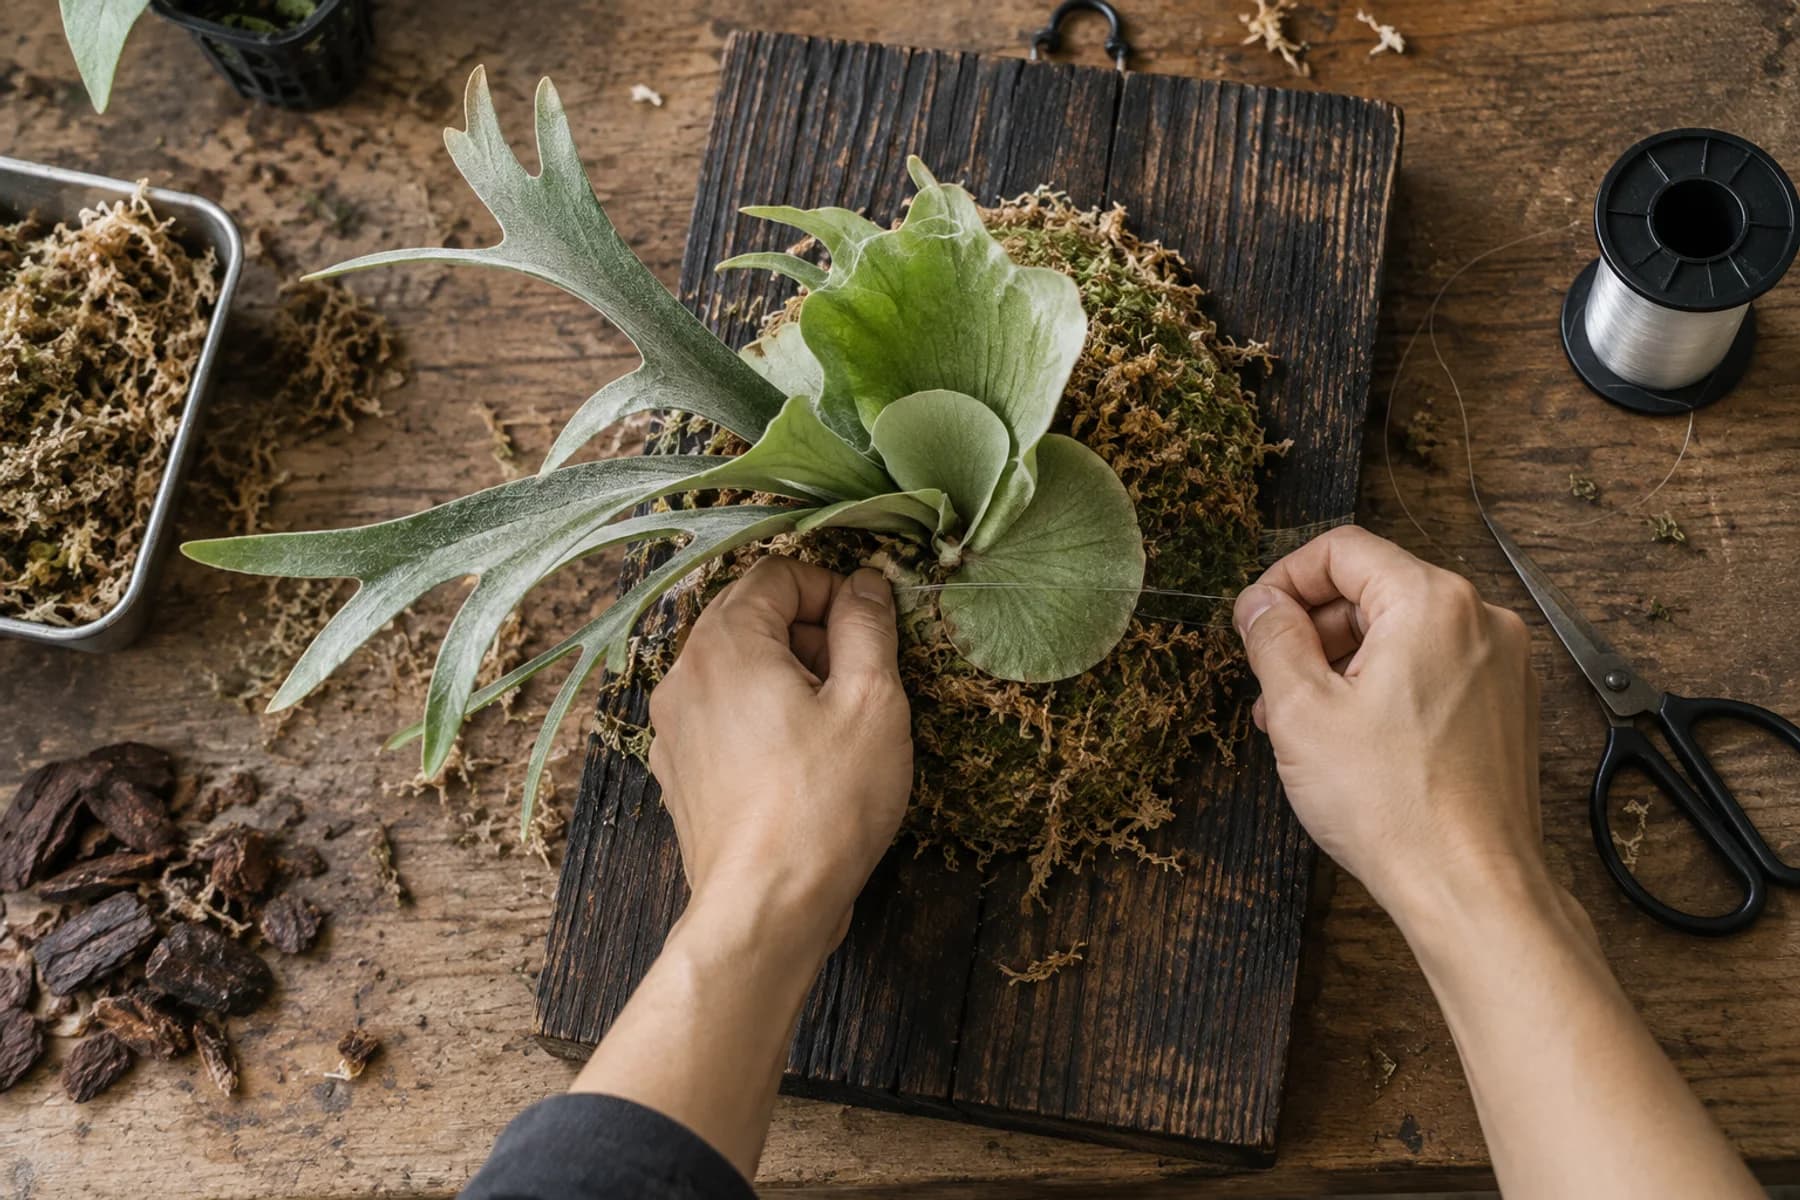
Mounting decides the plant's shape for a decade
Every Platycerium is an epiphyte. In the wild it wraps a trunk or branch with its shield fronds, layer over layer, and roots into the litter caught behind them. Mounting rebuilds that support. Once the shields have wrapped the board, the plant cannot be moved without damage, so the orientation, height and medium you choose now will still be shaping the plant years from now.
A staghorn fern will survive in a pot, but with nothing to press against, the shields spread loosely and the habit falls apart. If you want the full crown and the fertile fronds hanging as they should, mount it.
What to have on hand
Lay out the tools before you start. Soaked, wrung sphagnum moss; a little coconut coir or bark tucked into the centre of the moss ball, about a fifth of the mix, for airflow; a board with drainage holes on the back, tree-fern or timber; clear fishing line around 5 lb test, since thinner line cuts into your hands; two stainless screws; scissors; a round shaping mould if you want a tidy sphere; and a name tag for the cultivar.
Medium: sphagnum as the base, air adjusted by species
Start with long-fibre sphagnum moss. Soak it, wring it until it no longer drips, then pack it into a firm half-sphere. That ball is where the roots will live.
The variable is porosity. Species that rot in still, wet conditions, such as P. ridleyi and P. veitchii, want less moss, cut with bark or tree-fern fibre so water leaves quickly. Vigorous, moisture-loving species such as P. wandae take a deeper bed. When in doubt, err on the dry side. A mount that dries out can be soaked; a mount that stays wet loses the growing point.
Shaping the moss ball: the bowl method
The hardest part of a first mount usually is not tying the line, it is getting the moss ball round instead of lopsided and flat. The fix is simple: take a small pot close to the plant's original pot size, set it in the centre of a large mixing bowl, pack squeezed sphagnum around it, press firm, then flip the whole thing onto the board and lift the pot away. What is left is a hollow, evenly round moss ball. Tuck a little bark or leaf litter into the hollow so the centre of the root mass does not stay soggy and invite rot. Set the plant in with the growing point facing the opening, pack more moss around it, and press the outside into a clean sphere. This method is faster than shaping by hand and keeps the result symmetrical. A kitchen sieve works just as well as a dedicated mould. The hollow at the centre is left for the fine roots that grow from the back of the shield frond; there's no need to pack it solid.
Pick the seedling, then shape it, before you mount
Do not judge a seedling by its fronds alone. Look at the growing point first: it should be full, bright green, with the white fuzz intact. A bud that has gone black and sunken is usually beyond saving, so pass on it. Potted plants often have shields pushed out of shape by the container, so before mounting, true them up around the growing point into a solid oval: trim any shield that sits higher than that line, and pack a little extra moss under any that sits lower, just enough to level it without covering the leaf surface.
Boards: tree-fern, timber, cork
Tree-fern board breathes, holds a little moisture and takes roots easily, which is why it is the default in Taiwan. It slowly breaks down, and its export is restricted in some countries. Solid timber (pine, cedar, charred cedar) lasts for years and looks clean, but needs drainage gaps or drilled holes behind the moss. Cork bark is light, rot-resistant and suits small plants and the dwarf selections of P. willinckii. A stainless steel basket is another option: the mesh lets roots grow through on every side, drainage and airflow are excellent, and a plant can outgrow it for years before you need to change containers. The method is simple: pack sphagnum firmly around the sides and base first, add bark in the middle layer if the environment calls for it, sandwich in a layer of slow-release fertiliser under a thin cap of moss so roots do not touch it directly, then set the plant in and secure it, aluminium wire threaded through the mesh for a large specimen, fishing line wrapped around for a small one.
Go one size larger than feels natural. A mature P. coronarium or P. wandae weighs kilograms when wet; plan the hanger and the wall fixing before the plant needs them. Board aesthetics, in the sense LDS uses the phrase, is not decoration. It is choosing a frame the plant can grow into for ten years.
Orientation: point the crown up
At the top of the shield frond sits a sharply pointed, serrated crown; LDS calls it the spiked crown, 刺尖冠. Its direction is the direction the plant will grow. Set the growing point in the upper middle of the moss ball, crown pointing up, and tilt the whole plant a few degrees forward so water runs out of the crown instead of pooling in it. Get this wrong and no watering schedule will save the plant.
Tying: you are fixing the medium, not the plant
Fishing line, cotton string or a strip of non-woven fabric, wrapped around the moss ball and pulled until the ball does not shift under a firm push. If you anchor with screws, use stainless steel; a rusting screw damages the shield pressed against it. Drive each screw in at a forty-five degree angle, only halfway, so the exposed head can hook the line. Position each screw on the outer edge line of the moss ball, so the wraps bite into the whole sphere rather than just cinching the centre. Start with an adjustable slip knot looped over the lower screw, so you can draw it tighter as you go. Space the wraps about a finger-width apart, keep the tension even with a little give rather than crushing tight, since an over-tight wrap makes watering hard later. Keep the line off the growing point and any emerging frond; the shields will cover the line within a season. Keep it especially clear of the newest frond unfurling at the top of the ball. The lower half of the ball is the opposite problem — it's where moss sheds first, so wrap it denser and tighter than the top. Once the whole moss ball holds firm under a push, finish off: loop the line once around the screw and pull tight, wrap three more times, then loop it over once more and leave the tail long so it cannot work loose. Staples and nails work too, as long as they enter the moss well away from the bud. Fix the cultivar tag with a screw no longer than the board is thick, so its provenance and lineage travel with the plant.
The first two weeks: no water, watch, do not move
The moss is already wet on mounting day. For the next one to two weeks, do not water again. Slightly dry moss pushes roots outward to search. Give bright, filtered light and moving air, out of direct sun and rain. Do not move the board around, and do not feed.
What to look for: fresh green growth at the shield edge, and fertile fronds firming up rather than drooping. Old fronds wrinkling slightly is normal; a frond going soft and black is not. When a new shield begins to press itself flat against the board, the roots have taken hold and the plant is established. Only then does the mount count as finished.
Two things that look wrong but usually aren't
Two situations after mounting look like failure and usually are not.
First: a shield frond fans outward like a plate instead of lying flat. Usually the roots haven't gripped yet, and the medium behind the crown isn't packed solid enough to give the frond something to press against. Pack a little more moss into the hollow, then wrap the whole board in cling film, pressing the crown gently toward the board as you go. Leave it wrapped for about a month before checking. Keep it somewhere with moving air the whole time, and in summer shorten the wrap period or poke a few small holes for ventilation. If light only reaches the plant from one side, the frond edge will curl toward it; turning the plant or repositioning the light fixes this.
Second: after unwrapping a plant that was rooted in under film, there's a visible gap between plant and board, and the tie lines have gone slack. This is the medium shrinking through its normal wet-dry cycle, not a failure. The test is simple: push the whole moss ball — if it doesn't shift and the growing point hasn't lifted, it's fine. Pack a little fresh moss into the gap and re-tie, top and bottom first, then the sides, without pulling it tight enough to choke. After a soak, the moss shouldn't crumble away in your hand. A little airflow through that gap is actually useful; once the roots fill in, it closes on its own. Remounting the whole plant over this is unnecessary and does more harm to the roots than the gap ever would.
If you're not yet sure how a newly acquired plant will perform in your space, a simple mesh — a kitchen sieve or plastic netting — makes a fine temporary mount. Grow it there until you see steady new fronds and a plump bud, then move it to a proper board.
When to remount
Remount only when the shields have fully enclosed the board, the moss has collapsed, each new frond comes smaller than the last, or a crowd of pups is weakening the mother plant. A healthy, growing plant should not be moved for the sake of a nicer board. The best window is early spring, before the growing season begins. Not mass-produced. Cultivated. That includes the patience to leave a settled plant alone.
When you do remount, do not strip the old medium and roots back too hard; clear away only what has actually rotted. Trim too much and the plant redirects its resources into growing new roots first, so a frond that was already forming may fade or stall. Once the new roots settle and start absorbing again, the next frond comes in normal.
Images
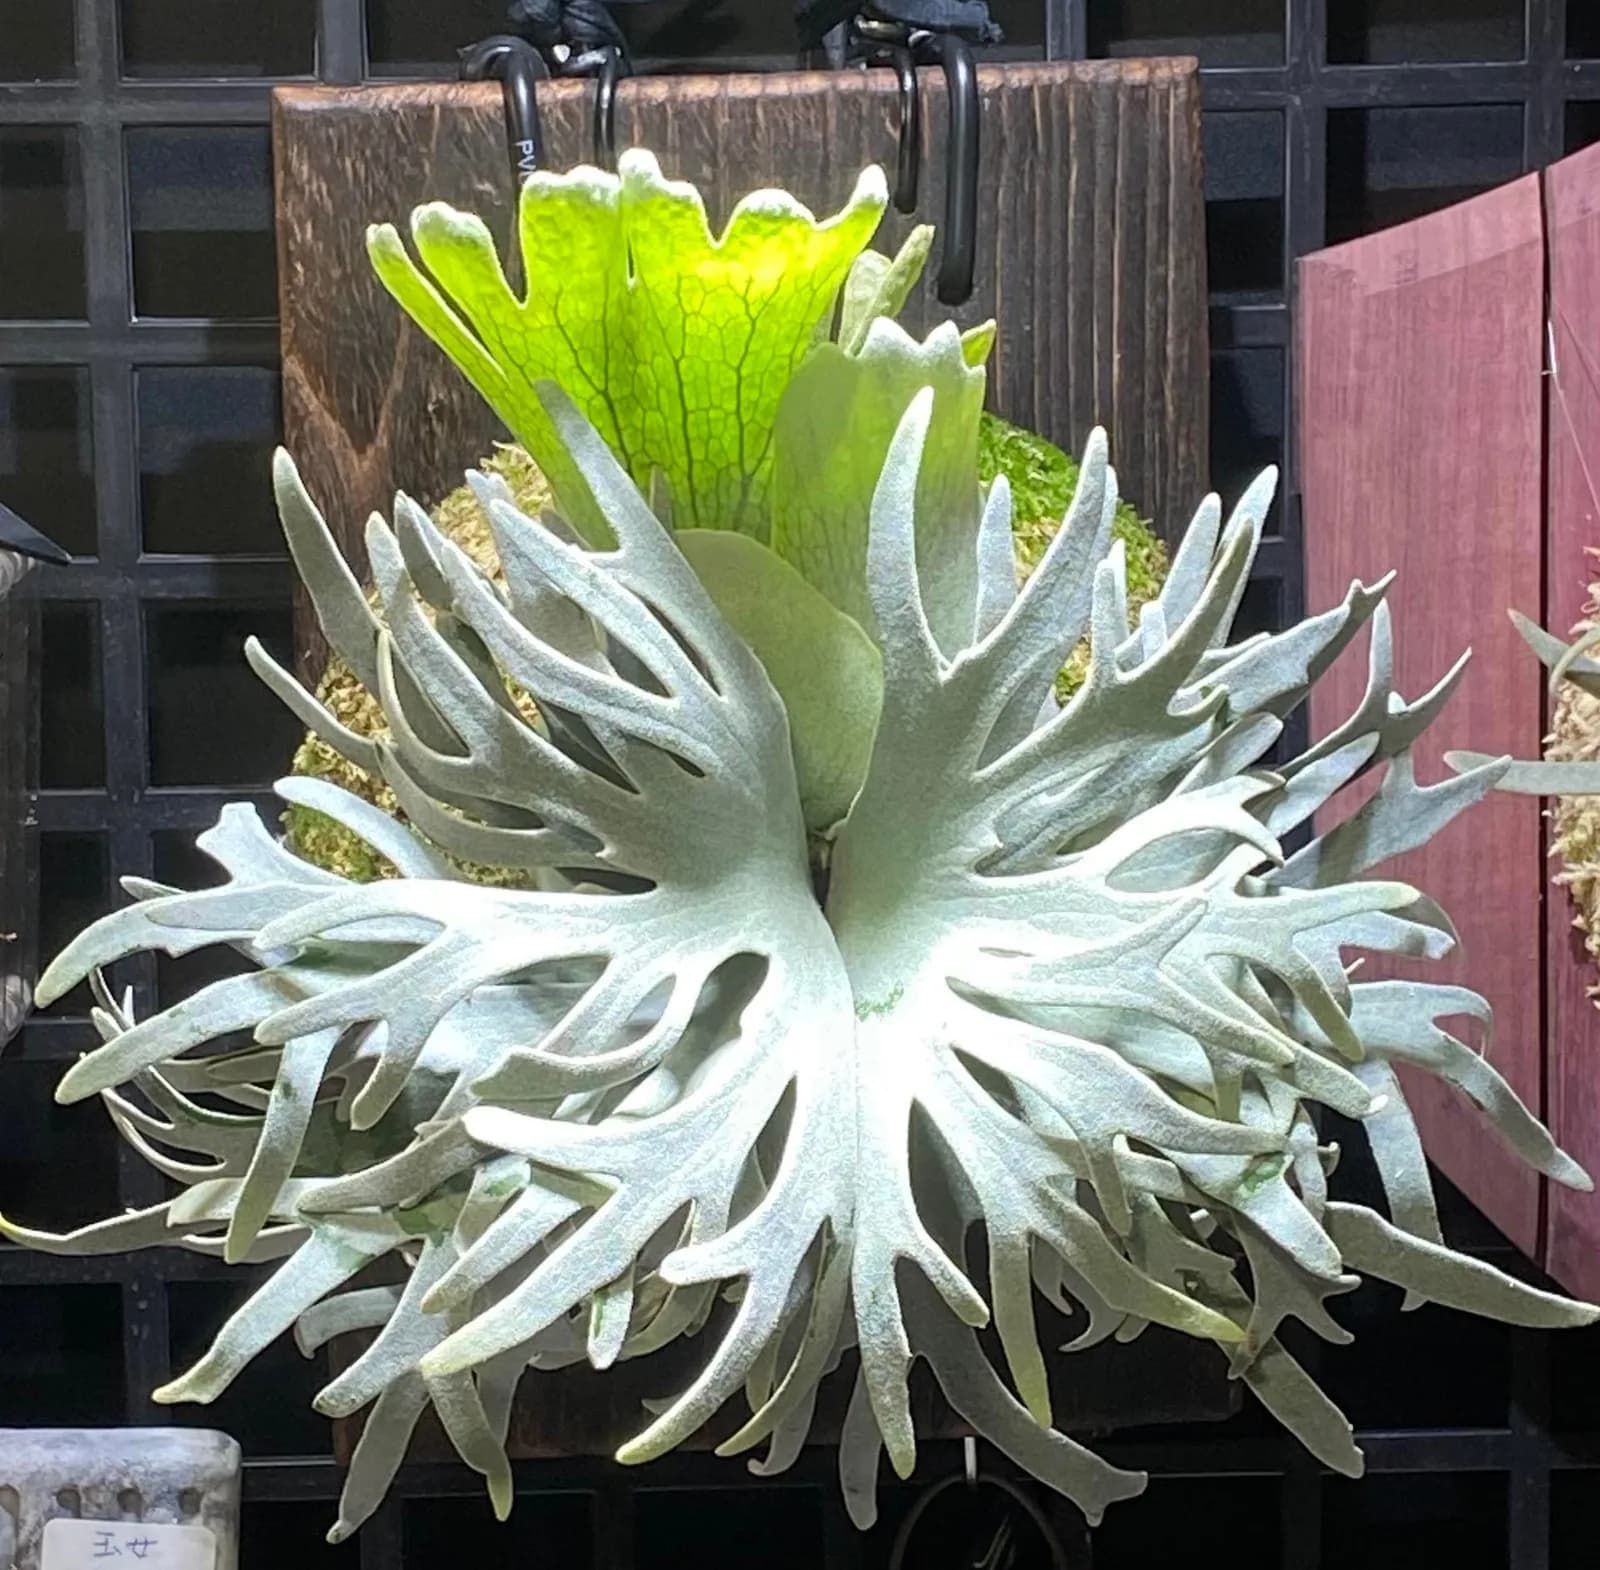
A mounted Platycerium willinckii 'Jade Girl' photographed in Taipei: dark wooden board, sphagnum, hanging hooks, silver-white fertile fronds spreading in every direction, a fresh translucent shield frond on top
FAQ
When is a Platycerium big enough to mount?
Once it has at least one complete shield frond of its own and roots that hold the medium, typically a palm-sized sporeling or a pup with its own shield. Spring to early summer is the safest window; avoid cold snaps and the hottest, stillest weeks.
How soon after mounting should I water?
Not for one to two weeks. The moss is wet at mounting, and slightly dry moss pushes roots outward. After that, soak only when the medium has dried. In the first month, err dry; daily misting does more harm than good.
Tree-fern board or timber?
Tree-fern board breathes and takes roots easily, the safer choice for rot-prone species and first mounts. Timber lasts longer and looks cleaner but needs drainage gaps behind the moss. Cork suits small and dwarf plants. Go one size larger than the plant needs today.
How often does the sphagnum need replacing?
There is no schedule. Replace it only when the moss has collapsed into mud, stays wet for days after soaking, or new fronds keep coming smaller. A healthy mounted plant can go years untouched; its shields enclose the old medium themselves.
Can a staghorn fern grow in a pot instead of on a mount?
It will live, but with nothing for the shields to press against the habit loosens and the crown never forms properly. A pot is fine as a nursery stage for small seedlings; for the full form, mount it.
Related species